Brake System Maintenance 5 Tips for Longevity
Extend the life of your brake system with these 5 essential maintenance tips. Keep your brakes in top condition for optimal performance and safety.
Brake System Maintenance 5 Tips for Longevity
Extend the life of your brake system with these 5 essential maintenance tips. Keep your brakes in top condition for optimal performance and safety.
Hey there, car enthusiasts and everyday drivers! Let's talk about something super important that keeps you safe on the road: your car's braking system. It's easy to take for granted until something goes wrong, right? But just like any other part of your ride, your brakes need a little TLC to keep them working their best. We're diving into five key maintenance tips that will help your brake system last longer, perform better, and keep you feeling confident behind the wheel. Whether you're cruising the highways of the US or navigating the bustling streets of Southeast Asia, these tips are universally applicable and crucial for your safety.
Why Brake System Maintenance Matters for US and SEA Drivers
Before we get into the nitty-gritty, why is this so important? Your brakes are literally your first line of defense when it comes to stopping your vehicle. Regular maintenance isn't just about preventing costly repairs down the line; it's about ensuring your car can stop when you need it to, every single time. For drivers in the US, with its vast highways and varying speed limits, reliable brakes are non-negotiable. In Southeast Asia, where traffic can be unpredictable and road conditions can vary wildly, having a consistently performing brake system is even more critical. Neglecting your brakes can lead to reduced stopping power, uneven wear, and in the worst-case scenario, complete brake failure. So, let's get proactive!
Tip 1 Inspect Your Brake Pads Regularly
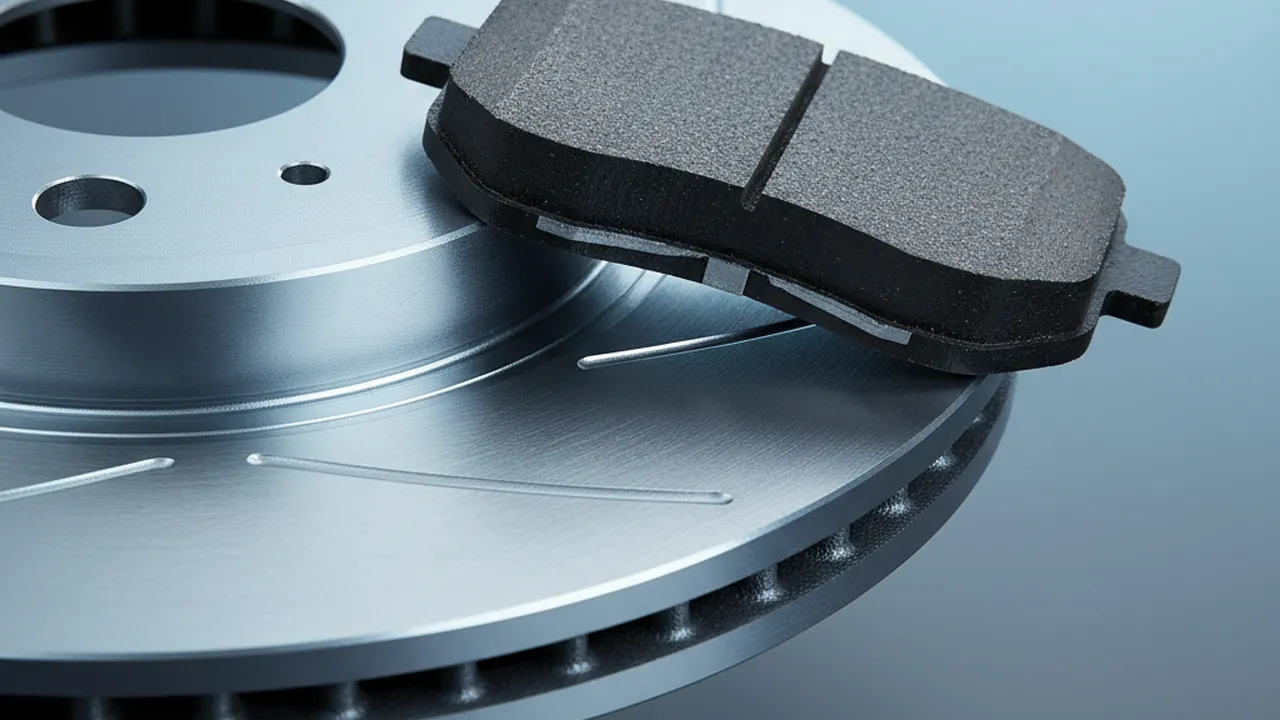
Your brake pads are the unsung heroes that create the friction needed to slow your car down. They're designed to wear out over time, and that's normal. However, ignoring their condition can be dangerous. Most brake pads have a small metal indicator that will start to squeal when the pads are getting thin. This is your first warning sign! But don't wait for the squeal. It's a good practice to visually inspect your brake pads every time you have your tires rotated, or at least every six months. You're looking for the thickness of the friction material. If it's down to about 1/4 inch (or 3-4mm), it's time for a replacement. Some pads also have a small groove in the center; if this groove disappears, it's a clear sign they need replacing.
Choosing the Right Brake Pads
When it's time to replace your pads, you'll find a few different types available:
- Organic (Non-Metallic): These are generally the cheapest option and are quiet and easy on rotors. However, they wear out faster and don't perform as well under heavy braking or high heat. Good for very light-duty driving.
- Semi-Metallic: A popular choice, these pads offer a good balance of performance, durability, and cost. They handle heat better than organic pads and provide strong stopping power. They can be a bit noisier and may wear rotors faster. Brands like Bosch QuietCast Premium Ceramic or Wagner ThermoQuiet are solid choices in this category, often priced between $30-$60 per axle.
- Ceramic: These are often considered the premium option. They are quiet, produce less dust (meaning cleaner wheels!), and are very durable. They also tend to be gentler on rotors. While they might have a higher initial cost ($40-$80+ per axle), their longevity and cleaner performance often make them a worthwhile investment. Look into brands like Akebono ProACT Ultra-Premium Ceramic or PowerStop Z23 Evolution Sport.
- Metallic (High-Performance): These are built for extreme conditions, like racing or heavy towing. They offer incredible stopping power and heat resistance but are often noisy, dusty, and can be very hard on rotors. These are usually overkill for daily driving.
For most daily drivers in both the US and SEA, semi-metallic or ceramic pads offer the best blend of performance, longevity, and value. Always check your vehicle's manual or consult a professional to ensure you're getting the correct type and fit for your specific make and model.
Tip 2 Check Your Brake Fluid Level and Condition
Brake fluid is the hydraulic fluid that transmits the force from your brake pedal to the brake calipers or wheel cylinders. If the fluid level is low, it could indicate a leak in the system or severely worn brake pads (as the caliper pistons extend further, requiring more fluid in the lines). Low fluid can lead to air getting into the system, which drastically reduces braking effectiveness – you might experience a spongy pedal. Beyond the level, the condition of the fluid is also important. Over time, brake fluid absorbs moisture from the air. This contamination lowers its boiling point, making it more susceptible to boiling under heavy braking, which again leads to a spongy pedal and reduced stopping power. It can also cause corrosion within the brake system components.
Brake Fluid Types and Replacement Intervals
There are several types of brake fluid, primarily DOT 3, DOT 4, and DOT 5. DOT 5 is silicone-based and not compatible with systems designed for DOT 3 or DOT 4. DOT 3 and DOT 4 are glycol-based and are generally interchangeable (always check your owner's manual!).
- DOT 3: Common in many older vehicles. Boiling point around 401°F (205°C) dry.
- DOT 4: Has a higher boiling point (around 446°F or 230°C dry) and is recommended for many modern vehicles, especially those with ABS.
- DOT 5.1: Glycol-based like 3 and 4, but with an even higher boiling point.
Brake fluid should typically be flushed and replaced every 2-3 years, or every 30,000-50,000 miles, regardless of how much you drive. This process removes the old, contaminated fluid and replaces it with fresh fluid. A full brake fluid flush and replacement can cost anywhere from $80 to $150 at a shop. You can also buy a gallon of quality DOT 4 fluid like Prestone DOT 4 Synthetic Brake Fluid or Valvoline Synthetic Brake Fluid DOT 4 for around $10-$15 and do it yourself if you're comfortable, though it requires care to avoid spills and ensure no air enters the system.
Tip 3 Inspect Brake Lines and Hoses
The brake lines (metal tubes) and hoses (flexible rubber or braided steel) are the pathways for your brake fluid. These components are under significant pressure every time you brake. Over time, rubber hoses can develop cracks, blisters, or leaks due to age, exposure to road debris, and heat. Metal lines can corrode, especially in areas where roads are salted in winter (common in parts of the US) or due to general environmental exposure. Any sign of leakage, cracking, bulging, or corrosion on these lines or hoses is a serious safety concern and requires immediate attention. A burst brake hose can lead to a sudden and complete loss of braking on one or more wheels.
When to Replace Brake Lines and Hoses
It's a good idea to have these inspected during your regular brake checks. If you notice any of the following, replacement is necessary:
- Cracks, cuts, or abrasions on rubber hoses.
- Bulging or swelling of rubber hoses, especially near the fittings.
- Corrosion or rust on metal brake lines, particularly if it looks deep or is causing pinholes.
- Leaking fluid from any connection point or along the length of the lines/hoses.
Replacing brake lines and hoses can be a more involved job. A shop might charge anywhere from $150 to $400+ per axle, depending on the vehicle and the complexity. If you're doing it yourself, a set of quality rubber brake hoses might cost $20-$50 per hose, while braided stainless steel hoses (offering better durability and feel) can range from $40-$100+ per hose. Metal brake line material is relatively inexpensive, but the bending and flaring tools can add to the cost if you don't have them.
Tip 4 Listen for Unusual Noises
Your car often tells you when something is wrong, and the braking system is no exception. Unusual noises are a common indicator of potential problems. The most frequent noise is the high-pitched squeal from worn brake pads, as mentioned earlier. However, other sounds can signal different issues:
- Grinding Noise: This often means your brake pads are completely worn down, and the metal backing plate is grinding against the metal rotor. This is serious and can damage the rotors, leading to a more expensive repair. Stop driving and get it checked immediately.
- Clicking Noise: A clicking sound when turning or braking might indicate a problem with a CV joint (if front-wheel drive) or possibly loose brake components.
- Squealing/Screeching (beyond the wear indicator): Sometimes, even with good pad life, you might get squealing. This can be due to glazed pads or rotors, or improper installation. Anti-squeal shims or a brake lubricant applied during installation can help.
- Popping or Clunking: These sounds could relate to suspension components like ball joints or control arm bushings, which work in conjunction with your braking system.
Don't ignore these sounds! They are your car's way of asking for attention. Addressing noises early can prevent minor issues from becoming major, safety-compromising problems.
Tip 5 Keep Your Brake Rotors in Good Shape
Brake rotors (or discs) are the large metal plates that your brake pads clamp onto to create friction. Like pads, they wear down over time. However, they can also develop problems like warping, grooving, or cracking. Warped rotors often feel like a pulsation or vibration in the brake pedal or steering wheel when you apply the brakes. Deep grooves or scoring on the rotor surface can reduce braking effectiveness and cause premature wear on new brake pads. Cracks are a sign of extreme stress and require immediate replacement.
Resurfacing vs. Replacing Rotors
When rotors become slightly grooved or develop minor warping, they can sometimes be 'resurfaced' or 'machined.' This involves removing a thin layer of metal to create a smooth, flat surface again. This is a cheaper option than replacement, typically costing $15-$30 per rotor at a shop. However, rotors have a minimum thickness specification, and if they are already thin or severely damaged, they cannot be safely resurfaced and must be replaced.
Replacing rotors is a common maintenance item. For most standard vehicles, a pair of new rotors might cost between $50 and $150. High-performance or slotted/drilled rotors can cost significantly more, ranging from $100 to $300+ per rotor. Brands like Centric C-TEK offer affordable replacement rotors, while PowerStop Evolution Coated Rotors or Brembo Blank Rotors are popular choices for better performance and durability, with prices varying widely based on the specific application.
When to Replace Rotors
- When they are below the minimum thickness specification.
- When they are significantly warped, causing pedal pulsation.
- When they have deep grooves, cracks, or other damage that cannot be safely machined out.
- Often, it's recommended to replace rotors when you replace brake pads, especially if the rotors show signs of wear or glazing, to ensure optimal performance of the new pads.
Taking these five tips to heart – inspecting pads, checking fluid, examining lines and hoses, listening for noises, and maintaining rotors – will go a long way in ensuring your braking system remains reliable and effective. Remember, your brakes are critical for safety, so don't cut corners. Regular checks and timely replacements are key to keeping you and your passengers safe on every journey, whether it's a short commute or a long road trip across continents.